Chances are you are reading this because you either just bought Dungeon Defenders and are looking for general tips and tricks or you accidentally mistook my blog for a medieval porn site. I assure you, you’re reading the former.
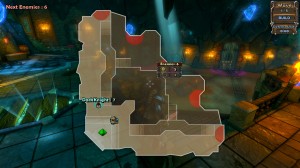
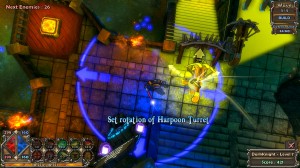
Like most tower defense games, it’s important to scope out the map first and foremost. You shouldn’t just start throwing towers and traps down without figuring out where your enemy is spawning and what path(s) they’ll take to get to the crystals you are tasked with protecting. For simplicity sake, I’ll be using the very first level (The Deeper Well) as an example.
You’ll notice that there are red dots above and to the right of the crystal. In wave one, they’ll only spawn from the one door as shown above. In the later waves they spawn from all of them. It’s important to plan ahead knowing this. The defenses you may setup now may not cover the paths monsters may take in future waves. Your first instinct may be to set up towers or traps by the stairs directly to the left and below the middle door spawn point. This would cover all of the monsters spawning from three of the five spawn points however. The door directly on top and directly to the right of the crystal will spawn enemies that will take a direct route to the crystal and the towers on the stairs below will do nothing to stop them.
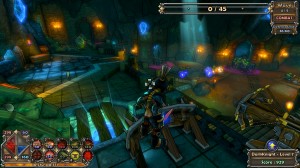
By placing your defenses closer to the crystal, you can eliminate enemies coming from multiple directions.
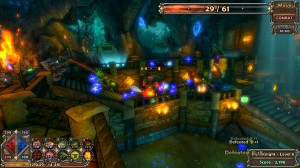
Choke points. Identify them and place your defenses where you’ll have to set up the least amount of towers or traps. You’re limited on how many towers and traps you can build via a population limit, so one or two well fortified choke points are easier to repair and reinforce as opposed to five weak choke points.
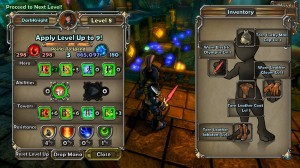
Leveling up allows you to get stronger. You have many stats to choose from when given the opportunity to increase them after leveling. If you are soloing a lot, you’ll want a few points in your tower health no matter what class you are. Playing alone means you have to cover a wider field and you’ll need time to get to your defenses to repair them. More tower health / trap detonation counts equals more time to react in an emergency and more survivability. Being a killing machine means nothing if you have a Borg army advancing on you and you can only hit one at a time. If you have a friend who’s got the defenses covered and doesn’t mind you kicking ass and chewing bubble gum (but you’re allll out of gum) then by all means, put your points into player damage.
Leveling up can take a while. The best ways to level are to try the earlier levels on a harder difficulty. You have less choke points to cover and you still get a great return on experience and mana. You also get bonus experience for not taking damage and not letting the crystal take damage at the end of a wave, so do your best to not let either happen.
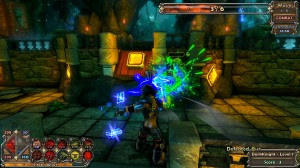
It’s fun to go ballistic when you’re a melee class, but it also increases your chances of getting hit which will rob you of an XP bonus at the end of the wave.
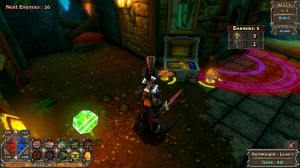
Treasure chests spawn in between every wave. Make sure you grab them and any loot they drop. If you’re full on mana / money and don’t feel like spending more on creating new or upgrading existing defenses, never fear. When you start the next wave, it all disappears and automatically gets deposited into your profile bank which is shared among all of your characters. If you have a friend with you, the mana disappears and is split between the two of you automatically. Any loot still lying around is sold for its estimated price value and that mana is split as well. You can identify loot on your map as black dots.
You may have already noticed this, but some, if not all, of your special abilities are assigned a number hot key. It’s much easier to hit “1″ than to navigate your build / hero menu to activate something. Most special abilities use mana so I recommend only using them when you need to, especially if you’re just getting by on keeping your towers repaired and upgraded as stronger enemies spawn. With that said, it’s also important to KNOW YOUR CLASS. Playing a Squire is much, much different than playing a Huntress. Four new classes were introduced as DLC (downloadable content) that are similar to the four main classes but have small differences. Perhaps I will outline all the classes in a later blog with strategies for each…look for it!
One last piece of advice I can give you is to visit the tavern after every level to equip better loot if you picked up any and to sell off the rest to deposit the mana into your profile bank. The game has made it easy for you to identify if an item you picked up is an upgrade via a green thumbs up or a red thumbs down. You’ll want to equip all the ones that are thumbs up, lock any items you want to save, then click “sell all” to get rid of the rest. Hardcore players may examine items more closely to see what stats each piece provides. If you’re building a character that has overpowered towers and want more of the same, you may keep a piece that increases the stats of your towers even though you just picked up a piece of loot which is an “improvement” but buffs your personal damage instead. Avoid buying weapons or armor as you’ll more than likely replace it down the line as you play harder levels. I personally save all of my mana for buying pets for my characters which are harder to come by and upgrading equipment I know I’ll have for a very long time. Avoid spending mana on things you’ll know you’ll replace soon, it’ll just be a waste. Think long-term investing. You can upgrade your pets and equipment via the tavern keeper / hero info button and then clicking on the item you want to upgrade. As of the latest patch, pets automatically gain XP as you use them so be sure to upgrade them often. One last thing to note, the shop refreshes its contents often with new, random equipment and pets. You can, however, lock items to keep it from being replaced if you see something you like but don’t have the mana for it now.
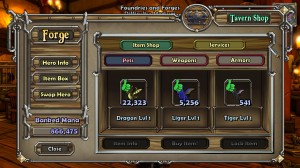
You can buy pets from the bartender. Being a Pokémon addict will not serve you well here, there’s no end to these little buggers.
I hope these general tips help you in your adventures. Feel free to comment below if you have any questions on these strategies or the game in general.

